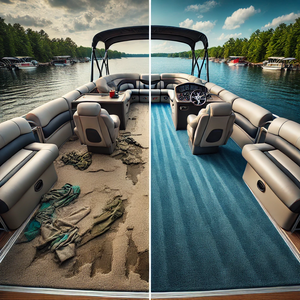
How to Remove and Install New Boat Carpet: A Step-by-Step Guide for DIYers
How to Remove and Install New Boat Carpet: A Step-by-Step Guide for DIYers
Whether your fishing boat’s carpet is showing its age or you’re looking to give your vessel a fresh look, replacing the carpet is a great DIY project. With the right tools, materials, and a bit of patience, you can save money and have the satisfaction of doing it yourself. Here’s a complete guide to removing and installing new boat carpet.
Tools and Materials You’ll Need
Before starting, gather these essential tools and supplies:
- Utility knife
- Scraper or putty knife
- Needle-nose pliers
- Acetone or adhesive remover
- Sandpaper or sander
- Marine-grade carpet
- Marine carpet adhesive
- Tape measure
- Marker
- Scissors or heavy-duty shears
- Paint roller or trowel
Optional: A heat gun or hairdryer to help loosen stubborn adhesive.
Step 1: Remove the Old Carpet
Removing the old carpet is often the most time-consuming part of the job, but taking your time here will ensure a clean surface for the new carpet.
-
Detach Components: Remove seats, storage lids, or any other fixtures secured to the carpeted areas. Label and store screws for reassembly later.
-
Cut and Peel: Use a utility knife to cut the carpet into manageable strips. Peel the strips away from the boat surface. For tightly adhered sections, use needle-nose pliers or a scraper to lift the edges.
-
Remove Adhesive Residue: Scrape off as much adhesive as possible using a scraper or putty knife. Apply acetone or adhesive remover to stubborn areas, letting it sit for 10–15 minutes before scraping again.
-
Smooth the Surface: Use sandpaper or a sander to remove any remaining adhesive or rough patches. This ensures a smooth surface for the new carpet to adhere properly.
Step 2: Measure and Cut the New Carpet
Accurate measurements are crucial for a professional-looking finish.
-
Measure the Surface Areas: Use a tape measure to calculate the length and width of each section you’ll be carpeting. Add a few extra inches to your measurements to allow for trimming.
-
Lay Out the Carpet: Unroll your marine carpet on a flat surface. Transfer your measurements using a marker and cut the carpet to size with scissors or heavy-duty shears. Keep edges straight for easier installation.
-
Test Fit: Place the cut pieces on the boat’s surface to ensure a proper fit. Adjust as needed.
Step 3: Install the New Carpet
Now comes the exciting part—installing your brand-new boat carpet!
-
Apply Adhesive: Using a paint roller or trowel, spread marine carpet adhesive evenly on a small section of the boat surface. Work in sections to prevent the glue from drying before the carpet is applied.
-
Position the Carpet: Place the carpet piece onto the adhesive, ensuring it’s aligned properly. Press it down firmly, smoothing out any air bubbles or wrinkles as you go. Use your hands or a roller to secure it evenly.
-
Trim Excess Carpet: Once the adhesive has set slightly, use a utility knife to trim any excess carpet for a perfect fit around edges, compartments, and corners.
-
Secure Fixtures: Reattach any removed fixtures, such as seats and storage lids. Ensure all screws and components are tightened securely.
Step 4: Let It Cure
Allow the adhesive to cure for 24–48 hours before walking on the new carpet or using the boat. This curing period ensures the carpet stays in place for years to come.
Tips for Success
- Choose the Right Carpet: Use marine-grade carpet designed to withstand moisture, UV rays, and wear. It’s more durable than standard indoor or outdoor carpeting.
- Work in a Ventilated Area: Adhesive fumes can be strong, so work in an open space or use a fan for ventilation.
- Be Patient: Rushing the process can lead to uneven adhesive, bubbles, or improper alignment.
Final Thoughts
Replacing your fishing boat’s carpet is a rewarding DIY project that can make your vessel look brand new. By following these steps and taking your time, you’ll achieve a professional-quality result. So, grab your tools and materials, and get to work on transforming your boat’s interior!

